大家好,我是深码青年!一个陪你快乐成长的三好青年!
不多废话,咱们开整!
服务器
前文已经介绍了,在搭建自己的个人博客的时候,云服务器是必不可少的东西,这里不再赘述,还有不知道怎么去选择的小伙伴可以看之前的文章:
接下来就是重头戏,怎么用好服务器:
大家在购买完云服务器之后,会出现服务器的信息:
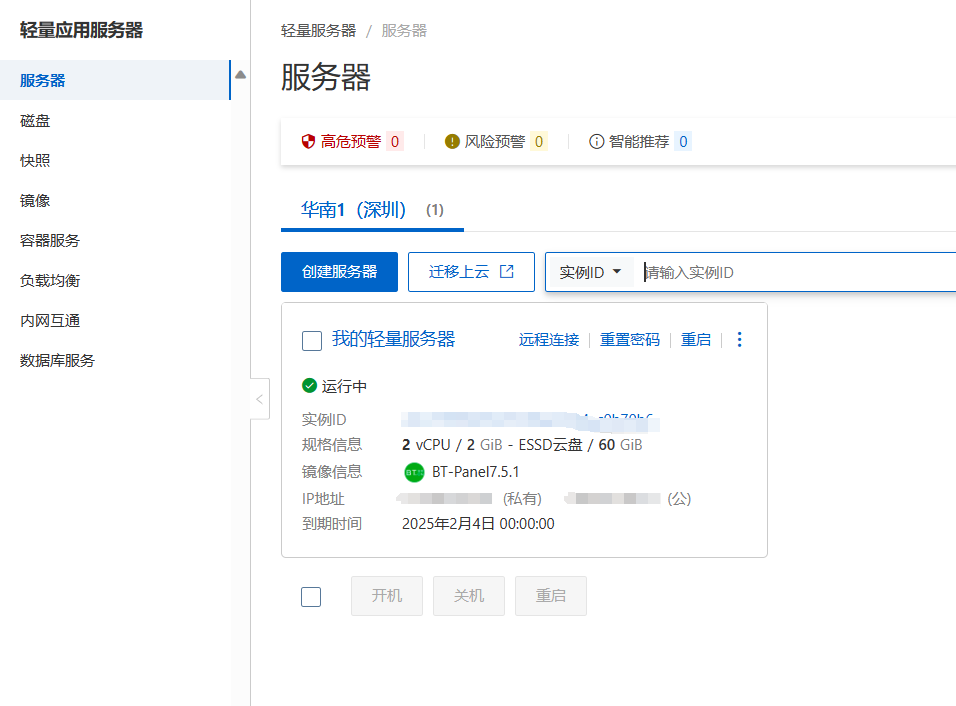
我们点进去,会看到如下界面:

此时,你的服务器还是处于初始状态的,在搭建个人博客网站的时候,要选择合适的应用镜像,我这里选择的是宝塔Linux面板

有的人也会选择LNMP效果都是一样的,以这个应用来控制所有的服务。
部署完成之后,我们就需要对服务器进行远程连接,这时就需要对密码进行重置,初始化的系统,我们是不知道密码的,需要手动编辑一个:

设置一个自己知道的密码即可,然后进行远程连接,此时,我们到应用详情中,按照给出的步骤进行查询面板信息即可:


知道了你的信息后,我们就可以输入面板首页地址,进行登录访问了,输入用户名和密码即可进入面板


到现在为止,恭喜你,我们的服务器算是初步搭建完成了!

安装环境
网站想要建立起来,没有对应的环境的话,那是不可能运行的起来的,好比你想吃上饭,首先你得有做饭的工具(别老是点外卖!)

一下工具是必须安装的:
Nginx 1.22.1
MySQL 5.7及以上(我的是5.7)
PHP 7.2以上(我的是8.0)
phpMyAdmin 5.2
大家可以安装的和我一样,不容易出错。
现在环境也安装好了,接下来这步,就是去WordPress官网,下载安装包了!

上传WordPress文件
官网地址:https://cn.wordpress.org/


把这个文件下载到本地
此时宝塔的环境差不多安装完了,一般情况下10-20分钟左右就能安装完,然后到网站选项中,创建一个网站,这个时候就需要注意了,如果你已经申请了域名,那么可以直接以域名的名称去设置网站名,如果没有申请,那就以你的服务器,公网ip来进行命名。

大家按照步骤来,进行创建网站即可,一定要手动选择创建数据库,他会自动给你生成好对应的文件:


进入这个文件中,大家会发现有四个文件,将红色框内的文件删除即可:

然后我们把下载好的WordPress上传到这个目录下,然后解压出来:

会生成这个文件,将这个文件夹内的所有内容都移动到上一次文件夹内,然后将wordpress文件夹删除


然后到页面上输入你的IP,就可以直接进行访问了!

那么现在就开始可以设置你的WordPress了!

设置WordPress
此时,我们需要配置数据库信息,前面在创建网站的时候,会自动把数据库也给你创建好,所以接下来直接把信息复制过去就好了:


然后将你的信息填写一下:


最后登录上:

然后输入你的ip,你就会看到:

恭喜你,你的博客已经搭建好了!

– END –
说起搭建网站这件事还蛮有意思的,可以点击蓝字,查看我的五年之路
点个关注呗。
原文出处: 3s源码 sss333.cn


暂无评论内容